
Welcome to the Crafty Collaborations blog hop. I am part of an amazing group of demonstrators from all around the world. We love showcasing the wonderful products which can found in our suite of catalogues. This month we are sharing projects using the spotlight technique. I’m delighted to share my Celebratory Sips Cheers Torn Card
Tearing technique
The tearing technique is a fun way to create texture and add interest to your crafty projects.
There are a number of different ways you can use the technique as shown below:
Basic Tearing:
- Straight or Angled Tearing:Hold the paper between your thumbs and forefingers, and gently pull the paper up and away from your body, using small, controlled movements for a straight tear or a slight angle.
- Wavy Tearing:Similar to straight tearing, but use your fingers to guide the paper in a wavy or jagged path for a more textured edge.
- White Edges:If the paper has a white core, you can control whether you want a white edge on the torn piece by tearing from the front or back.
Advanced Tearing:
- Water Guide:For a precise tear, dampen a line where you want to tear the paper with water before tearing.
- Distressing Edges:Use tools like a knife or scissors to scratch or tear the edges to create a worn or vintage look.
- Scrunched Paper:Crumpling paper before tearing can add a unique texture to the edge.
- Wet Edges:Wetting the edges of the paper before tearing can create a softer, more blended edge.
Tips for Tearing:
Experiment:Don’t be afraid to experiment with different techniques and paper types to discover your own unique style.
Control:Use small, controlled movements for precise tears.
Paper Type:Heavier weight paper may require more force or be more difficult to tear cleanly.
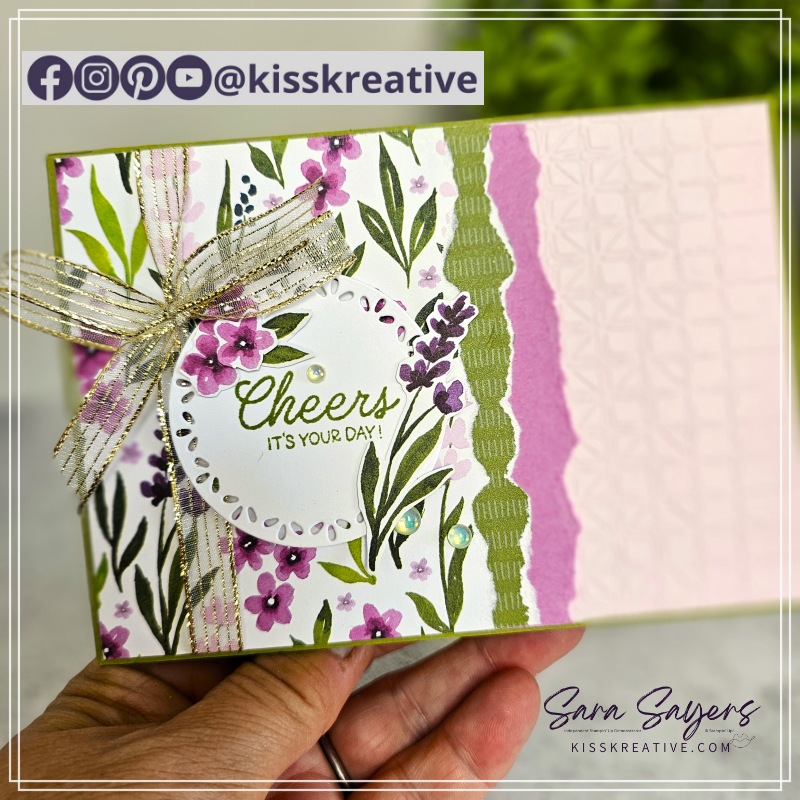
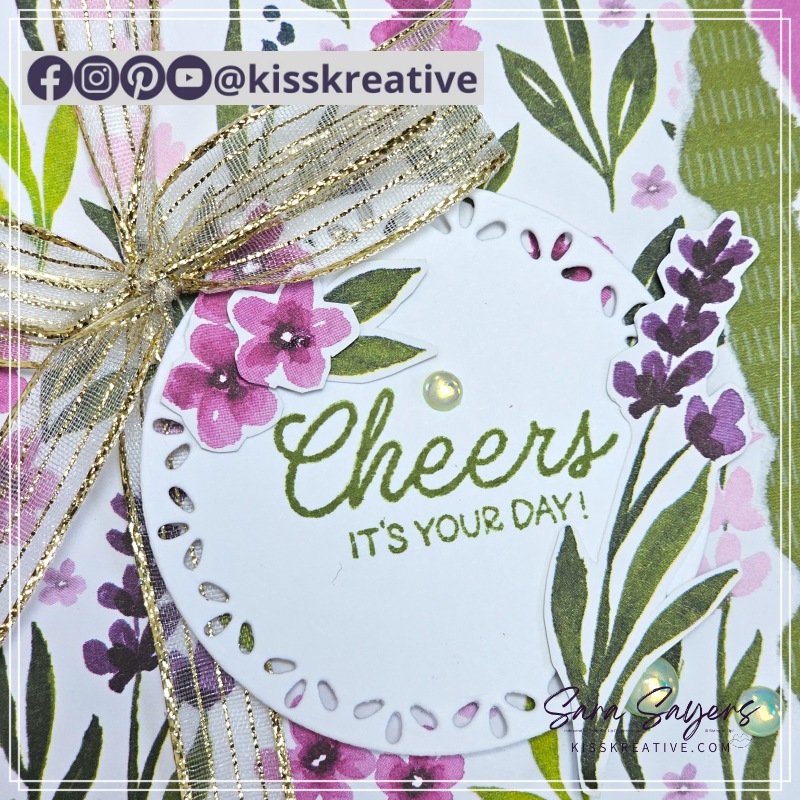
Celebratory Sips Cheers Torn Card
I made this card on my twice weekly Connect-Craft-Chat Facebook live session recently.
I just love the Celebratory Sips Suite in the Online Exclusives, but wanted to try something a little different, I used only the floral elements and added some torn edges for added interest and texture.
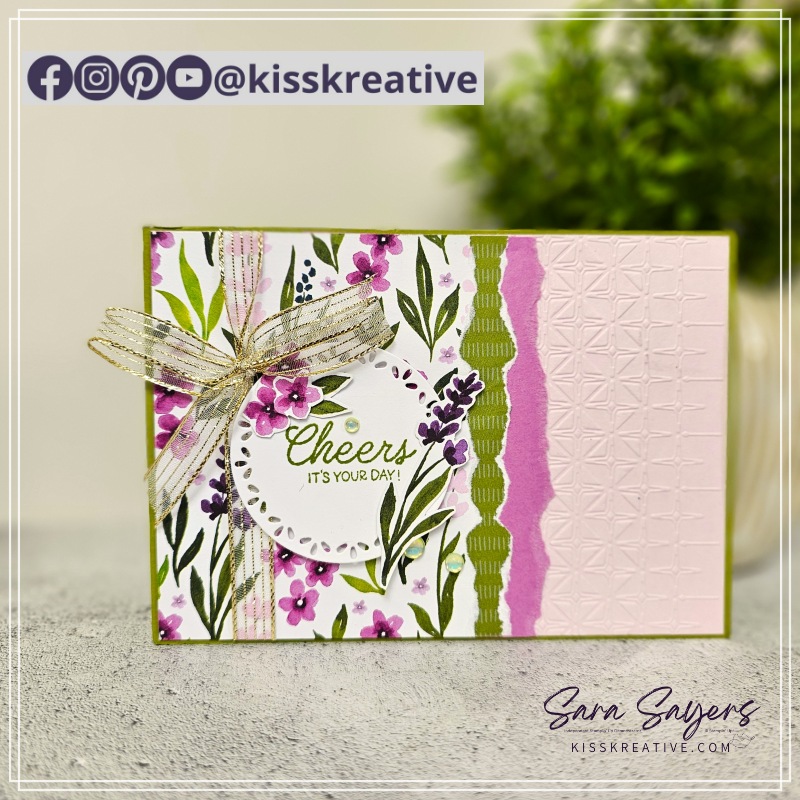
For this card, emboss the right hand side of the piece of Bubble Bath Card using the Glass Embossing Folder & add to the cad base.
Take the piece of Petunia Pop and tear a 2-3 cm strip down the (middleish) with the short side at the top
Take the piece of DSP and repeat the process but this time 2-3 cm from the right hand side
Turn the smaller piece of DSP over and glue to the back of the main piece of DSP with about 1cm overhangingtot he right asshown above.
Repeat the process to add the piece of torn Petunia Pop.
Add some gold mesh Ribbon and tie in a bow.
Add to the card base
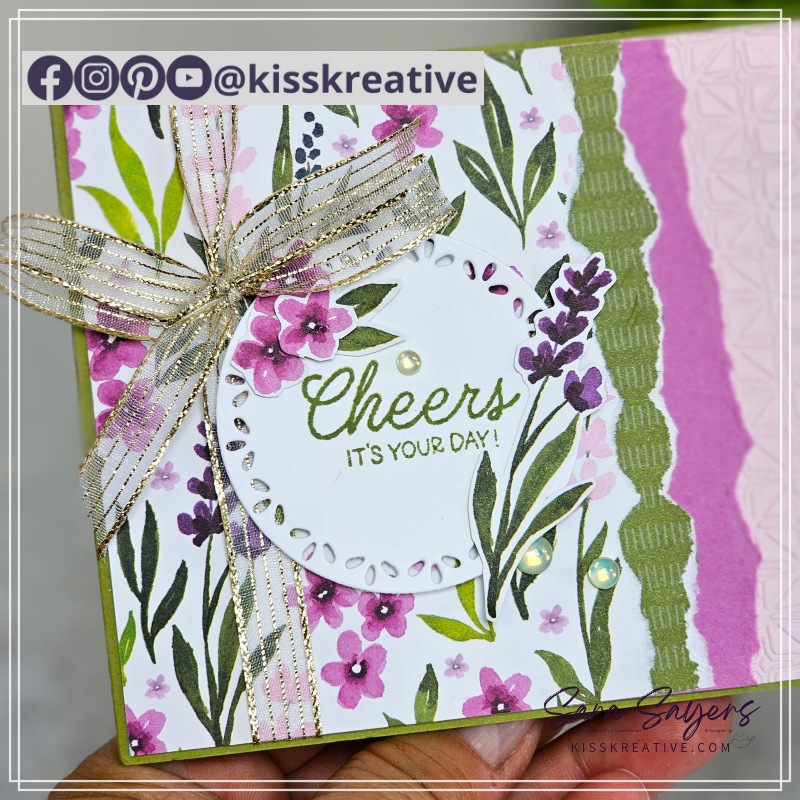
To decorate:
- Die cut a circle and stamp the sentiment in Old Olive Ink.
- Add to the card with Dimensionals
- Add some fussy cut flowers from the DSP
Finish with some Holographic Resin Dots
Measurements – Celebratory Sips Cheers Torn Card – Technique Tuesday
- Base – Old Olive: 29.7 cm x 10.5 cm scored at 14.8 cm
- First Layer – Bubble Bath: 14.5 cm x 10.2 cm
- Second Layer – Petunia Pop: 7.0 cm x 10.2 cm
- Third Layer- Celebratory Sips DSP : 10.0 cm x 10.2 cm
- Sentiment – Basic White: 6.0 cm x 6.0 cm
- Images – Celebratory Sips DSP – Fussy Cut
- Inside – Basic White 14.5 cm x 10.2 cm
Voila!
I so enjoyed making this card and I would love to know what you think? Please do leave me a comment.
If you would like to know more about any of my projects please do get in contact and I would be happy to help you
So now it’s time to hop around the rest of the wonderful demonstrators blogs to see some more inspiration for using these wonderful patterned papers
See the rest of the International team below!
Technique Tuesday Blog Hop Team
Stamping Hugs
Sara
- Shop Stampin Up – Earn 10% rewards on all qualifying purchases over £20
- Request a catalogue
- Buy a starter Kit
- Find out about joining our group of Hugs & Kisses Stampers


beautiful
Such a pretty card Sara, love your colour combo x
Love these colours together, how gorgeous!